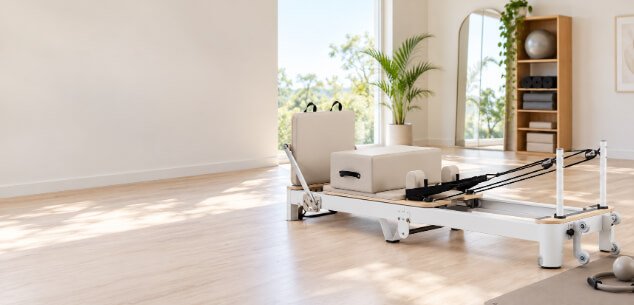

A reformer class looks nice and smooth on the outside. The carriage glides, the springs hum & everybody seems to know exactly what he is trying to do. And then you try it yourself and realize how much is happening at the same time from movement & resistance to balance & breathing. No matter if you go to a studio class or work out at home, knowing how to use a Pilates reformer machine properly makes every session count more. But it’s easy to pick up small technical slips, and they can erode your control or leave you aching in all the wrong places. The good news is that most of them are repairable. Some awareness, some tweaks & some guidance from a qualified instructor goes a long way. Along here are ten mistakes to look out for.
Understanding Proper Pilates Reformer Technique Before You Begin
Before you buy a Pilates reformer online, understanding common mistakes helps you know what good reformer technique looks like. It comes down to three things:
- Controlled movement: Move the carriage smoothly in both directions. Rushing or leaning on momentum takes away the control that makes the exercise work.
- Breathing and alignment: Breathe naturally and let your breath follow the movement. Keep your spine and pelvis in a sensible position, but don’t lock yourself into a stiff posture.
- Appropriate resistance and progression: Pick spring settings that suit the exercise and your current ability, and lean on your instructor’s advice. If you’re planning to buy fitness equipment online, research the machine’s features and check it suits you before you commit.
Common Pilates Reformer Mistakes and How to Correct Them
Even people who’ve practiced for years pick up habits that creep into their form. Spotting them early makes it easier to build better movement patterns and walk into each session with more confidence.
1. Using the Wrong Spring Resistance
Plenty of people choose springs purely on how heavy or tough they feel. But resistance changes both how hard you work and how much stability you need to control the carriage, so heavier isn’t automatically better.
How to avoid it: Stick to the spring settings you’ve been given and ask your instructor if you’re unsure. The right resistance depends on the exercise, the design of the equipment, and your own ability.
2. Moving Too Quickly and Relying on Momentum
Speed hides problems. When you rush, it’s harder to keep control or notice that your alignment has drifted. Letting the carriage swing back on its own without managing the return makes things worse.
How to avoid it: Slow right down. Aim for smooth, deliberate movement in both directions. If you can’t control the carriage comfortably, ask your instructor to help you dial the difficulty back.
3. Holding Your Breath During Exercises
A tough movement has a way of making people stop breathing without realizing it. Your body tenses up, the exercise feels harder than it should, and your rhythm falls apart.
How to avoid it: Keep your breathing steady and match it to the movement where it makes sense. If you are not certain how, your course instructor can recommend a breathing pattern which will be appropriate for the exercise.
4. Poor Spinal and Pelvic Alignment
Arching the lower back too much, tucking the pelvis too far, or letting the ribs flare open can all throw off your position. What counts as correct alignment also changes from one movement to the next.
How to avoid it: Follow cues that help you keep comfortable control through your spine and pelvis. Don’t force one fixed position across every exercise, and ask your instructor to check your form now and then.
5. Tensing the Neck and Shoulders
Shrugged shoulders, a tight grip on the straps or a strained neck all add tension you don’t need. It shows up most in arm and core work.
How to avoid it: Let your shoulders drop and keep your neck comfortable. If an exercise strains your upper body, ask about changing the movement, adding head support or reducing the range.
6. Rushing Through Reformer Setup
Jumping straight into the first exercise without checking the machine is an easy way to end up in the wrong position or with settings that don’t suit you. The footbar, headrest, straps & springs all need to be right for what you’re about to do.
How to avoid it: Take a minute to check everything before you start. If the machine is new to you, ask your instructor to show you the adjustments instead of changing parts on your own.
7. Locking the Knees or Overextending the Joints
Pushing your knees into a locked position, or forcing a joint past a comfortable range, puts stress on the body that you don’t need. It usually happens when you’re chasing a bigger movement.
How to avoid it: Work within a comfortable, controlled range and follow alignment cues. If a position hurts, don’t push your knees or any other joint into it.
8. Using the Wrong Muscles to Complete a Movement
When an exercise feels too hard, the body finds a workaround. You might grip through your hip flexors or hike your shoulders up instead of keeping the trunk control the movement is meant to build.
How to avoid it: Cut back the range or make the exercise easier if you need to, and think about what the movement is actually for. Understand which muscles should be doing the work and how to spot the usual compensations.
9. Attempting Advanced Exercises Too Soon
Advanced moves are tempting, especially when someone beside you makes them look effortless. But moving up before your control and coordination are ready makes good technique much harder to hold.
How to avoid it: Get comfortable with the foundational exercises first. Progress at the pace your own ability and your instructor’s advice suggest, not by comparing yourself with the rest of the room.
10. Ignoring Discomfort or Failing to Ask for Corrections
Discomfort isn’t something to push through as a matter of course. Carrying on through sharp or lingering pain can make it harder to work out what’s really going on.
How to avoid it: Stop any movement that causes pain. Look for a modification, or get proper healthcare advice if you need it.
A Pre-Workout Checklist for Safer Reformer Pilates
The whole session will feel more stable if a number of quick checks are done before it begins. This is true of any Pilates equipment whether it be in a studio or in your home: make sure the setup is correct, select an appropriate level of resistance, and make sure your movements are controlled.
- Make sure that the footbar, headrest, straps and springs are set with your instructor or according to the manufacturer’s instructions.
- Know which setting of the springs are appropriate for the exercises you have planned.
- Wear comfortable clothing along with adhering to the grip sock policy of your studio.
- Let your teacher know of any injury, movement restrictions or concerns.
- Start with good warm-up & basic movements.
- Stop an exercise & seek advice before continuing if it is hurting.
Setting up a workout space at home? Look at a suitable home Pilates reformer and think about your available space, how you’ll use it & your experience level. If you’re planning a wider home gym, it’s also worth comparing other options such as rowers and trainers.
See also: How Wholesale Apparel Helps Businesses Reduce Printing Costs
Conclusion
The major errors made by reformer users can all be traced to just a handful points: attending to how your body feels, choosing springs that you are actually able to control, along with preferring smooth movements to complicated ones. Actually, it makes no difference whether you’re using the reformer in a studio or at home; what makes the difference is that when you’re not clear about something you ask questions. Proceed at your own pace & get a qualified instructor if you’re unsure as it will boost your confidence.